Showing posts with label DIY. Show all posts

Wednesday, August 8, 2012

Where Did the Summer Go?


We are already in our second week of school with students...so that's three weeks of school for me.  Summer felt like it went by quickly even though I didn't go anywhere.  I normally go to Roswell, and had a great costume planned, but given my health over the last year by the time we got to the end of the school year I was exhausted.  I'll take the time to finish my costume over the course of this year and go next year.

Meanwhile, back at the ranch...

I put up a few new posters in my classroom.


And I built a dining room table.  

Many thanks to the great Ana White, who posted plans for this lovely farmhouse table.   My jigsaw is on loan to a friend, but even if it weren't, I wouldn't want to cut a whole bunch of 1x10 with it.  So I went to Lowe's as soon as it opened at 6 am and had them make the cuts.  They were extremely accurate and extremely friendly.  

Here are some process photos:
This table top is solid...here I am standing on top of it before adding the legs.
Before staining.
I distressed the top before I stained it.


Finished!
So far, it's been a great sewing/paperwork table.  I can't say I've eaten a whole lot of meals while sitting there, though.  I need dinner guests!

Oh...and many apologies for the lack of updates.  My phone (which doubles as my camera) got stolen shortly after I built the table.  I just replaced it.  Therefore, no method for taking pictures.  Fortunately, a lot of these were saved on Instagram.

Monday, June 25, 2012

iPad Flip Case and Stand Tutorial

My dad is the most impossible man to shop for EVER.  Anything he wants he just goes out and gets for himself.  For Father's Day, I wracked my brains for a long time to figure out what to give him.  Since he's obsessed with the tablet he purchased last year and has a very boring slide-in cover for it, I figured one of these would be perfect.


Unfortunately, they're expensive and not all that unique.  Now, if you have a boring, run of the mill dad then that might be fine, but my dad is responsible for some of my best party stories, so one of those wasn't good enough.


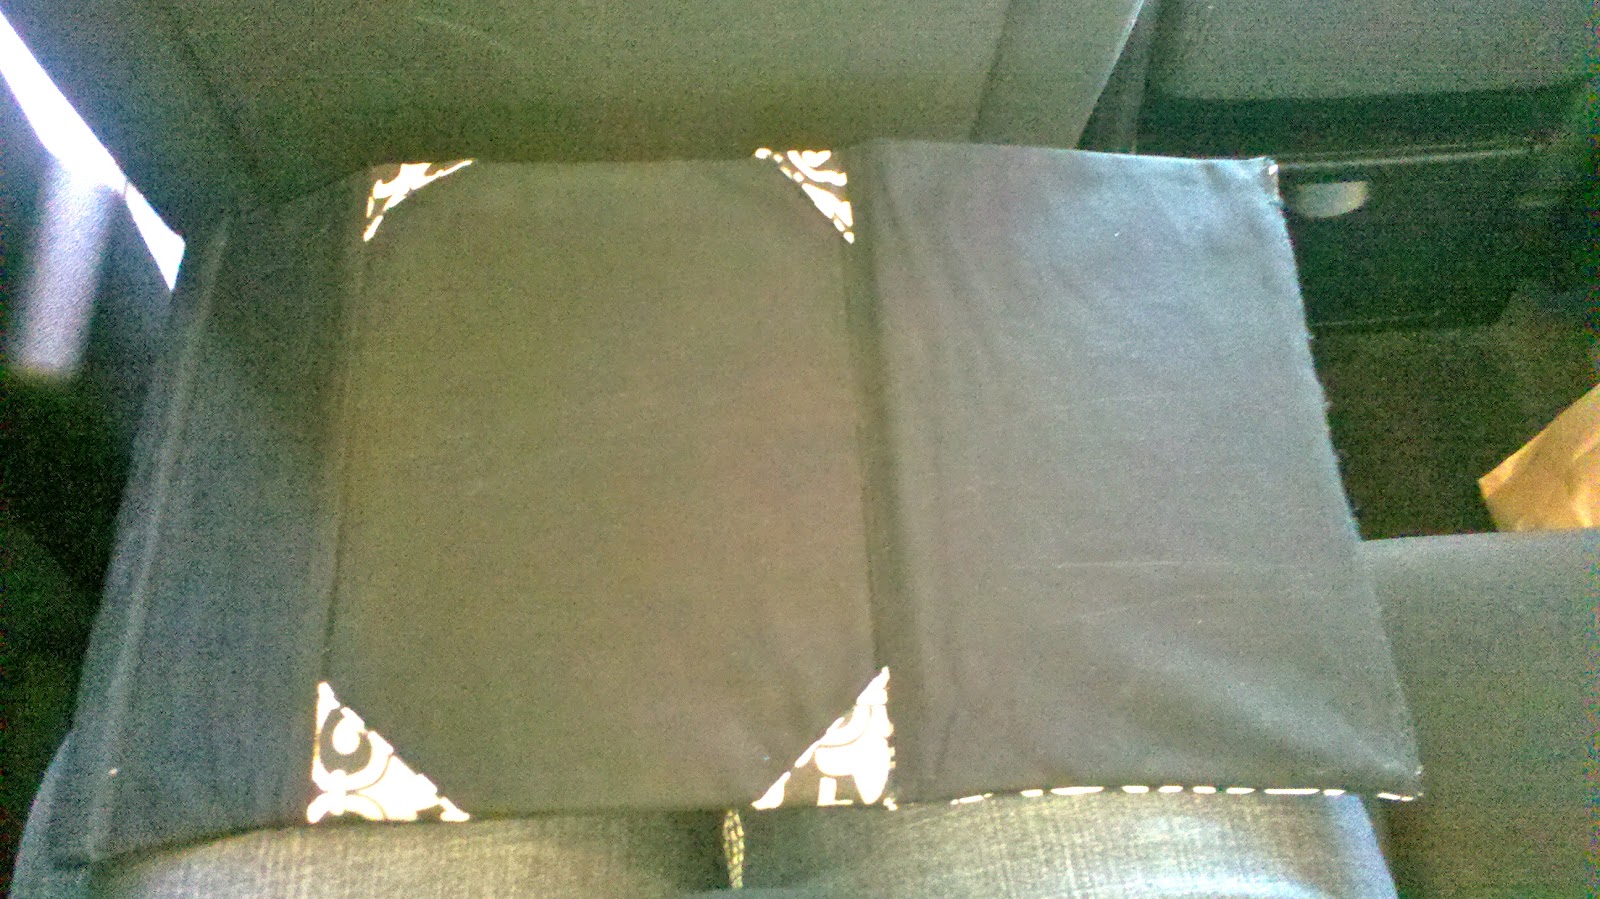
I couldn't find any free tutorials on this online, so I just made one.  Naturally, I forgot to take pictures of the process because I threw it together in a couple of hours the night before.  You get a lovely mix of actual (but crummy phone) photos and computer drawings.  I ask that you only use these for personal gifts, because I'm not making any money by posting the tutorial here.  Enjoy!


Materials:


1. Two kinds of fabric.  1/4 yard of each should do it.
2. Scissors.
3. Rotary cutter (you can also just use scissors)
4. Measuring device of some kind.
5. Rotary cutting mat.
6. Utility knife.
7. Roll of adhesive craft magnet.
8. Square (optional but handy)
9. Embroidered letters for monogramming.
10. Tablet, or if you don't have the tablet, a cardboard mock-up as a template.
11. Chalk for marking.
12. Elastic (optional-I didn't end up using it).
13. Vinyl floor tiles.  These go for between 35 and 99 cents each at home improvement stores, depending on how rigid they are.  You decide what works best for you.
14. Sewing machine and matching thread.
16. Iron and ironing board.

Assembly:
1. Measure your tablet.  If you're making it as a gift and don't have the tablet, make a cardboard template.
2. Cut four pieces of fabric 1.5-2 inches larger than your tablet, two pieces with a length that matches the pieces you just cut and a width about 2/3 of what you just cut, and four squares about 1/4 the size of your first four pieces. The color combo is up to you, but you can see how these are laid out below (pieces are numbered for future reference):


3. Cut your squares in half diagonally to form 8 triangles.  Place the triangles right sides together and stitch according to the diagrams below:

4. Press the seams open, then fold wrong sides together and press flat.

5. Pin the triangles in place on piece #3, right sides up.  If you want to use elastic along the edges for extra tablet security, pin that in place now.
6. Lay out your odd numbered pieces as shown below.  Stitch 1 to 3 and 3 to 5, RIGHT SIDES TOGETHER.


7. Press the seams open.


8. Repeat steps 6 and 7 using your even numbered pieces. 

9. You now have two sides that look the same except for the corner pieces.  Place them RIGHT SIDES TOGETHER and stitch 3 sides.  Leave the top side open.


10.  Clip your corners and turn right side out.  You might need to poke the corners out.  You should now have something that resembles a pillowcase.

10.  Measure how large each of your 3 sections are and subtract 1/4 inch from both the length and the width.  Cut your vinyl floor tiles to those measurements.  (To cut a vinyl floor tile, just score it with your utility knife and then bend it to "break" it.  It's extremely easy.  Leave the paper backing in place, because they're hard to handle when sticky).

***UPDATE***

I made an error here. See that top section?  You're actually going to use two separate vinyl pieces for that.  The one nearest the end is a very narrow strip that is the same size as your magnetic strip.  So you can still use your measurements, then add the magnetic strip and simply cut that section free.  Does that make sense?

11. Cut magnetic strips to the length of the vinyl pieces and place them on the tiles as shown below.  (Back side refers to the side you're not looking at when you can see the corner pieces).

12.  Slide the bottom vinyl piece inside the case and top stitch along your previous seam between pieces 3 and 5.  Slide the middle section of vinyl in and top stitch along your previous seam between pieces 1 and 3. Slide in your third section and top stitch again. A zipper foot makes this top stitching a lot easier, since the vinyl creates a sort of ridge between sections.

13. Fold over the top (not sewn) edge and press.  Trust me, this makes it easier.  Slide in your last piece of vinyl (the very narrow strip with the magnets on it) and stitch the top edge closed, sewing as close to the edge as possible.


 14. You can now fold your case closed (the magnets should catch and hold it in place) and decide where you want to place your monogramming (optional).  If you're using those embroidered letters, just follow the directions on the package.

15. You can fold this out into a stand, as shown below.  The magnets will catch to hold everything together.  And if you're worried about magnets affecting your tablet, consider that these are the magnets rated a 2 out of 10 on magnetic strength by the craft store.  It's hard to get them to stick to the fridge.  They'll do the job for this project, but they're probably not going to damage anything.  I say probably, of course, because I'm not responsible if they do cause damage.


 The tablet should slide into the corner pockets.  My dad didn't have his tablet with him on Father's Day but he tells me it fits perfectly and he loves the case.

If you liked this tutorial, please share!


Thursday, June 21, 2012

Easy DIY Landing Strip

I have a chronic disorganization problem, but to most people apparently I appear to be organized.  At school, I misplace my keys regularly, but at home, thanks to my handy landing strip by the front door, I always know where they are.  This trick is relatively simple, functional, and looks good!

To achieve this, you'll need:

1. An antique furnace grate (I found mine at an antique store for about $20)
2. Toggle bolts, or a suitable wall anchor of your choice.  There's a great tutorial at Natural Handyman.
3. A good power drill.  
4. Measuring tape.
5. Pencil.
6. Carpenter's level.
7. Round craft magnets* (the strong ones) from a craft store.
8. Giant clothespin or other fastener from the craft store (optional).
9. Spray paint (optional).
10. Stud finder (optional).


To install:

1. Decide where you want your furnace grate to go and measure it. 
2. Mark the midpoint of the wall where you'd like to hang it along with the midpoint of the grate.
3. Using the carpenter's level, draw a line level with the mark you just made on the wall.
4. Look at where the holes are for mounting the grate.  You can use the stud finder to determine whether one of them will line up with a stud in your wall, which is handy because then you can anchor it to that on the one side and not have to mess with a toggle bolt on that side.
5. How heavy is the grate?  Determine which type of wall anchor you'll use.  My grate is cast iron, so toggle bolts were really the only option.  Measure the distance from the holes in the grate to the wall.  Your anchors are probably going to have to be pretty long.  Also check to see how big the hole is; you don't want the anchor to slip right through the grate.
6.  Line up your grate on the wall with the marks you just made and mark the location where you will drill the holes for the anchors.
7. Drill the holes for the anchors.
8. Place the bolts through the holes on the grate and thread the toggle onto the end.  Make sure you do it correctly! 
9.  It's handy to have a friend for this step: line everything up, fold in the toggles, and push them into the wall.  Using your drill, tighten the bolts.  You'll want to try to work evenly on each side, so tighten a little on the right and then a little on the left and so on until everything looks good.  Trust me on this!  It's hard to do otherwise.  Hence the friend. 
10.  Place the magnets along the bottom edge of the grate and toss your keys up there.  They'll stick and you'll never lose them again!
11.  Glue a magnet to the back of your chosen fastener (spray painted in the color of your choice) and stick it to the side.  Perfect place for outgoing mail!
12.  Add some coat hangers underneath the grate for even more places to put things you need at the door.


As you can see, this is a great place to drop incoming and outgoing mail, hang your keys and ID badges, place your glasses (seriously, I'd lose mine if they weren't here!), bluetooth headset, etc.


*Important note about magnets: if you have kids or pets, you need to be extra careful to keep these rare earth magnets completely out of their reach.  If they swallow them, they can attach to one another in the digestive tract and cause severe damage and death.  My cats haven't swallowed any, but I'm pretty careful!

Monday, April 2, 2012

DIY Retro Robot Lamp

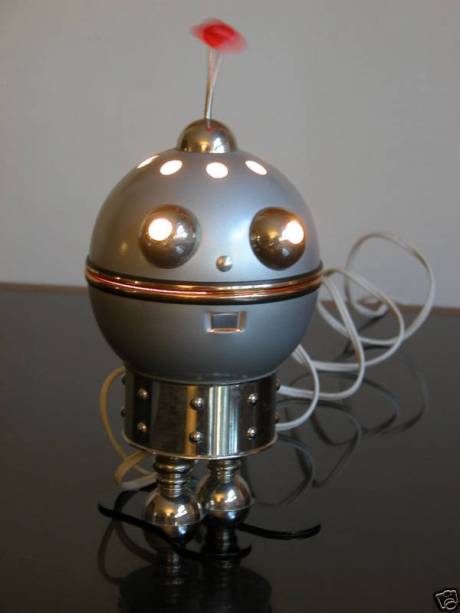
Over our two week school intercessions, I need things to keep me occupied.  This time, I decided I needed a reading lamp for my living room but didn't find anything unique enough.  I wanted something that looked like it belonged in the space age, and a Google search led me to this:
Unfortunately, these things are as expensive as they are hard to find.  I looked at it and thought, "I could make that!"  If you want to make your own, here are the materials* you need:

-A cylindrical metal container with a bottom, like a cup or bowl
-Two metal bowls of the same size
-Three smaller metal objects, at least two of which are the same size (for the eyes and top of the head)
-A spring (optional, for the antenna)
-Two round drawer handles with necessary hardware
-1/2" long machine screws (with nuts)
-1 roll galvanized pipe strapping (found in the plumbing aisle)
-Lamp kit with cord and socket
-Duct or electrical tape (optional)
-Drill with different sized bits
-Screwdrivers
-Pliers
-Superglue, metal epoxy, or similar
-A paintbrush you don't care about
-Eye protection
-Gloves

I didn't take pictures as I went (sorry!), but here are the steps and pictures of the final product so you can see how it's put together.


1. Drill all of your holes. Drilling metal is dangerous and tricky.  Wear gloves and eye protection, and work over a fire-proof surface like concrete.  Expect hot chunks of metal to fly and protect exposed skin accordingly.  In your cylindrical container, drill 6: two for "feet", one for the lamp assembly itself, one for the cord, one for the pull chain of the lamp assembly, and one for the "kickstand" you'll put in the back to stabilize your robot.  In one metal bowl, drill 5: two for "eyes", one for the top of the head, one between the eyes and near the lip of the bowl, and one directly across from the last one.  In the bowl that will be the bottom, drill two holes near the lip of the bowl in the same locations as the other one.  


2. Make a very large hole in the bottom of the last bowl-basically you're removing the bottom.  I accomplished this by using the largest drill bit I had and drilling several holes close together.  Then I used pliers to sort of rip the rest of the bottom out.  It wasn't perfect, but it worked.  If you're worried about the sharp metal edges, cover them with some tape. 

3. Add the robot's feet by screwing your drawer handles in place.  There will likely be too much space between the handle and the body of the robot-fill it with nuts or washers. Cut a 2-3" piece of the pipe strapping and screw it to the body of the robot with a machine screw.  Bend it to form a kickstand.

4. Remove your lamp kit from the packaging and familiarize yourself with the directions.  Remove the pipe and cap from the bottom of the socket.  Thread the following onto the cord in this order: nut and washer if you need it, pipe, body of robot (cylindrical container), washer if you need it and nut.  Tighten the nuts on either side of the pipe; you don't want too much sticking out of the bottom.  

5.  Thread the socket cap onto the cord and tie an underwriter's loop with your two wires above the cap.  

6.  Loosen the terminal screws on the socket.  Find the wire that is either white or covered in a ribbed coating, and loop the exposed end around the SILVER terminal screw and tighten.  Attach the other wire to the BRASS screw in the same manner.  Fit the socket back together and screw it onto the end of the pole.  

7.  Disconnect the ball from the pull chain, thread the chain through the hole in the bottom of the robot, and reconnect the ball.  Pull on it to make sure that it can move freely.  TEST THE SOCKET.  If it doesn't work the first time, try a different bulb.  Remove the bulb and set this portion aside.  

8.  Cut a 2" and a 3-5" piece of pipe strapping.  Attach the 2" portion to the bowl that will be the top of the head using a machine screw.  Use the hole that is at the BACK of the head-opposite the eyes.  Attach the other end of the pipe strapping to the bowl that will be the bottom of the head.  You want there to be very little space between the bowls.  This piece of pipe strapping is the hinge and it's easier to attach if you bend the pipe strapping "open" before attaching the second bowl. 

9.  Attach the longer piece of pipe strapping to the holes in the front of each bowl.  You may want to leave one side unattached until you are finished and put in the bulb, depending on how small your robot is.  This will allow you to open and close the robot's mouth to control the amount of light.  The pipe strapping will bend inward when the mouth is closed.

10.  Using your glue or epoxy, coat the edges of the eyes and the top of the head and adhere them over the holes you drilled.  Attach the spring or whatever you're using for the antenna.  Remember that you have to work quickly with this stuff, and whichever paint brush you use should be one you plan to trash when you're done.  Follow ALL of the directions on the package.

11.  Coat the top edge of the robot's body (where the light socket is) with the glue or epoxy and settle the robot's head onto the body.  Fill in any gaps and allow to dry.  

12.  Place your bulb in the socket, tighten up any loose screws, plug it in, and enjoy!  If you want more light, open the mouth.  Less light, close the mouth.  


I decided to try mine with a green bulb and really like the effect.


It goes perfectly on these shelves I found over the weekend.  After searching flea markets all day, I saw this  shelving unit sitting in someone's driveway with a "for sale" sign on it when I was driving home.  It's very solid (not particle board!) and the price was right.

This lamp fits right in with my odd collection of alien and retro stuff that I'm starting to accumulate, and with a regular bulb in it is perfect for reading.  Hooray!

*A word or two about the materials:

-Lamp kits are available at craft stores, but I recommend the hardware store.  Your selection of switch types will be limited at the craft store, and the kits often come pre-assembled with the wires already attached.  They aren't attached with screws and if you try to remove them to thread them where they should go in your final project, they'll break off inside the socket and you're out ten bucks.
-The bowls are hard to find in the right size.  I got mine at a thrift store.  
-The eyes and top of the head are salt and pepper shaker lids.  Again, thrift store.
-The body is an aluminum mug I found at the store.  I left the handle on in the back because it will make the lamp easier to move while in use (it will undoubtedly get hot). 


Monday, August 15, 2011

Weekend Project: Free Couch Upgrade


So I should totally be in bed right now, but I figure I'm going to spend half the night getting my neurotic cat to stop howling at the window all night and anyway the pants I want to wear tomorrow are in the dryer and I don't want to iron them, so I'm waiting for them to be done.

Now is the perfect time to display my weekend project! On Friday I acquired a free couch from Freecycle. Google this organization if you don't know what it is. It requires you to join a yahoo group and you get a lot of emails, but every once in awhile there's a real find. I've been using a papasan chair for over a year and really wanted something that was a) more comfortable, and b) didn't say "OMG what a nice dorm room!"

I picked it up Friday and on Saturday one of my colleagues helped me get it up my stairs. Below is the before picture. It's in good shape, but it's missing the seat cushion (flew out of someone's truck, apparently). One of the back cushions isn't pictured; those bags are stuffing. Also, it's kinda boring.

It came with four throw pillows that had backs in the same fabric as the couch and this stuff on the front, which really doesn't jive with my whole color scheme:
Grandma always said, waste not, want not. I endeavored to use as much of the original fabric as possible, so I only removed the front panel of each back cushion. This saved me a lot of work, as I didn't have to mess with the zipper! I then used the panels I removed and the back panels from the throw pillows to piece together a bottom for the seat cushion. That way, everything is tied together, too.
The seat cushion. Wow. That was an adventure. I was originally going to use foam, but JoAnn Fabrics was charging $80 a yard for 5" thick foam! Holy mole! I spent some time being frustrated but then realized that I had a ton of stuffing at home-even more if I took stuffing out of the poor, tired papasan mattress that had no hope of survival anyway-the grape kool-aid stains would see to that. So, I took the stuffing from the papasan to stuff the seat. None of the cushions fit particularly well right now, but with some use the stuffing will settle. I have two extra bags, so if it settles too much I can always add more!

The addition of the couch required a new furniture arrangement....so the bench that used to be my tv stand long ago has moved to the "dining room" which is now just officially a practice and book room, because there's no way a table is ever going to fit in there. My cello doesn't even get to stay there.

Total cost of the project: $30 for two yards of upholstery fabric (54" wide) at Hobby Lobby on sale. Not bad! I did spend some time cleaning and steaming the couch-but who doesn't have a ton of time, right? Right?


Monday, June 27, 2011

Summer Projects, Continued


First update: the dreads! We are now three weeks in. This is how they looked yesterday, down:


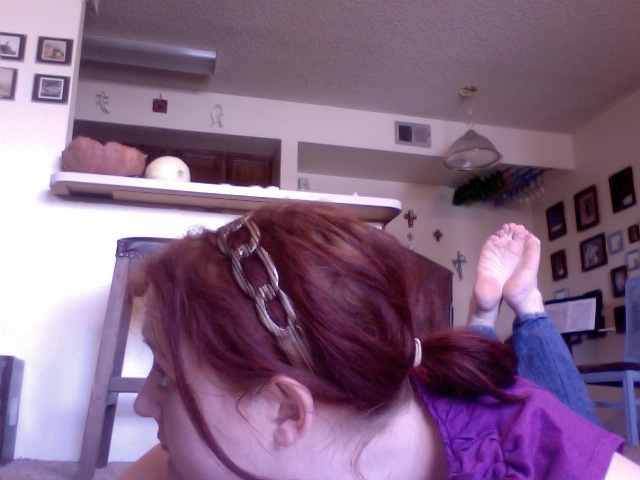
They are starting to knot up quite nicely on their own, and they are also looking more natural as of late. I'm quite happy with them. Today it was nasty hot, so I put them up in a ponytail with a headband and I'm relieved that I can still do that with dreads:

Yup, I'm laying on the floor as I type this. I love the floor.

So, other projects this week. First, I cleaned out the closet in my craft room and finally found a use for that old wood pallet that's been sitting on my front porch for ages. I screwed a few pieces of wood in as extra shelves and am now using it as fabric storage:

Of course you can see all of my Christmas decorations on the right side. On the left, camping supplies, Halloween decorations, and costumes (for Roswell and Halloween) and accessories including makeup.


Also, my yarn:

I made a couple of jewelry holders this week too.


One of them has all of my cross jewelry (as it turns out, I have a lot)

The other has a screen behind it and holds my earrings and necklaces. Some of these things (the bright blue stuff) is my grandma's old costume jewelry. The round ones are clip-on earrings, so I put them on a ribbon and hung them like a necklace.


Finally, I added a shelf in the living room to display the family collection of MKT model trains. My grandpa on my mom's side worked for MKT for years, and my dad worked on the railroad once upon a time, too. MKT is no longer in existence, so the models are kind of special:


The higher shelf on the right contains my mom's leather-bound Louis L'amore books. I haven't read them yet but I'll get around to it eventually. It also contains my grandma's 8th grade English book, a shell casing from the 21 gun salute at my grandpa's (dad's side) funeral this year, and a rather unique gift from a former student. The framed document above the trains is my grandpa's (mom's side) fishing license.

All in all a busy and productive week at home! I also enjoyed a long rehearsal today with my lovely colleagues and CLASString Quartet members. Grieg is lovely! And our violist, Linda, is my latest henna convert!
Related Posts Plugin for WordPress, Blogger...